(Food is Love. Food is Culture. Food is Connection. Food is Adventure.)


Showing posts with label bbq. Show all posts

Monday, September 10, 2012

Real New England BBQ

Real New England BBQ?  Yes, I said "New England" BBQ, because that's where we live.  ;)

We are big BBQ fans -- which in case you don't know is not the same as "cooking out."  Texas, Carolina, Memphis, Kansas City, you name it.  It's all good.  And while there are a slight few worthy restaurants near us for this type of food, it's still hard....very hard....to find good BBQ around us.  So, why not make our own, right?

What we have for you in today's third foodventure installment (can you tell it's a catch up day on the blog?) is yet another Alton Brown recipe.  He calls it AB-BQ, and while it's time consuming, it's easy peasy.  Here's how we did it (of course we didn't stick exactly to the recipe)....

YOU WILL NEED:
  • 3 quarts water
  • 12 ounces kosher salt
  • 8 ounces  molasses
  • 8-10 pound boneless pork butt (We only used about 3 pounds, because we're only 2 people and also that's the size we found at our local supermarket)
  • Special Equipment:  A smoker and 4 ounces of hickory or oak wood chunks

WHAT YOU WILL DO:

1.  Place the water, salt, and molasses in a large container and stir until the salt dissolves.  Add the pork butt to the brine and weigh it down to make sure it is completely submerged.  Alton suggests filling a zip top bag with 2 cups of the brine and laying it on top of the pork to accomplish this, but we opted instead to lay a couple of small plates on top of the pork -- works just as well.

2.  Cover and refrigerate overnight.  Remove the pork from the brine, and pat dry.

3.  Heat your smoker to around 225 degrees F.  Add the wood chunks, and place the pork into the smoker.  AB's recipe didn't call for it, but since our smoker has a separate tray for liquid, Hubby filled it mostly with water and then added a 12-ounce can of Coke to the water.  In it went to the smoker.

4.  Cook until the pork reaches an internal temperature of 150 degrees F, or 4 to 5 hours.  We didn't use a thermometer, and since our pork butt was a lot smaller than what AB's recipe calls for, we just smoked it for four hours.  Note: you may need to add more charcoal or wood chips throughout the process, depending on how long you soaked your chips, the temperature outside, and how fast things burn off.

5.  A bit before you go to take the meat out of the smoker, heat your oven to 300 degrees F.  Wrap the pork in aluminum foil and transfer to a pan with high enough sides to catch any drippings (we don't want no messes in the oven, now do we?).  Place on the center rack and cook until the pork reaches an internal temperature of at least 200 degrees F, anywhere from 3 to 5 hours.

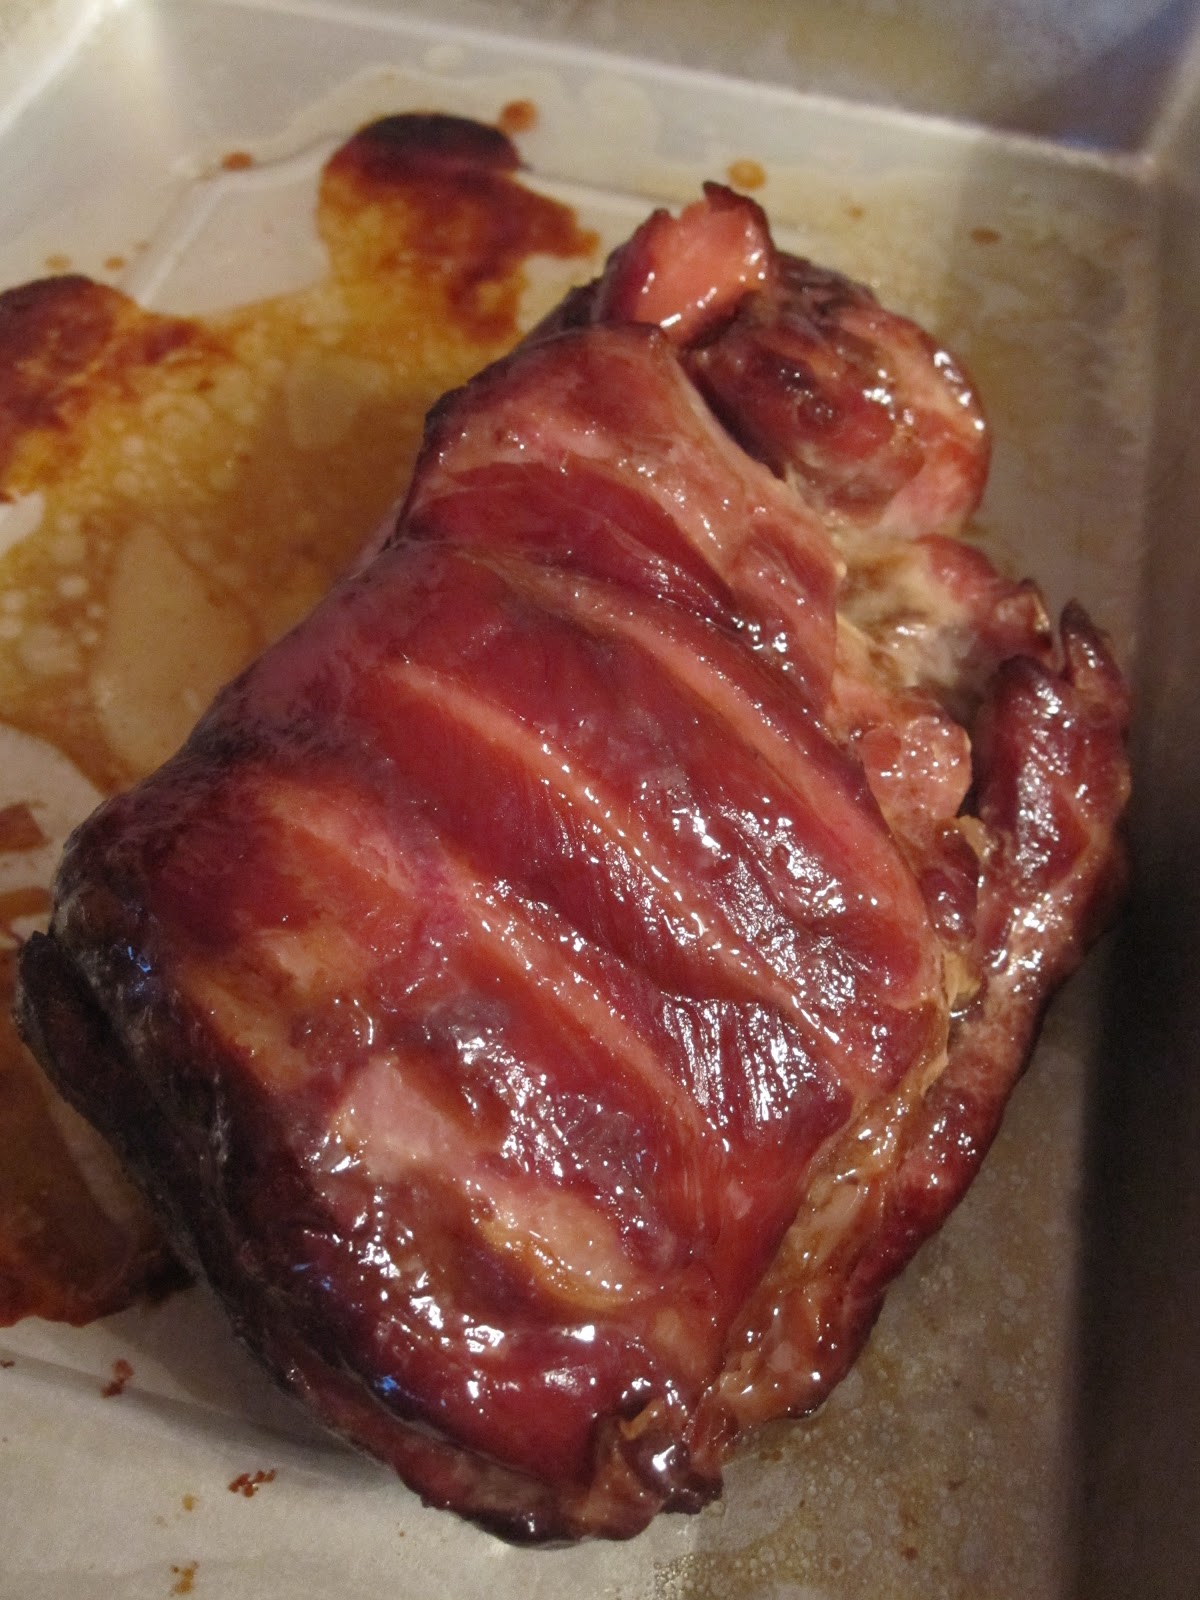
6.  Remove from the oven and rest, covered for 30 minutes before serving, pulling, or otherwise messing with it.  This is what ours looked like after resting:

Dayam, right?
 
Look at that caramelization!  Mmmmmm.

And the smoke ring.  Ooooooh!

7.  Use two forks to pull the pork apart.


So.  freaking.  good.  We served it with garlic-chive mashed potatoes, buttered corn, and a sliced garden fresh tomato.  The sauce that you see on top here was whipped together by Hubby.  Unfortunately, like most of his rubs and sauces, no measurements were done, but we can tell you that it contains ketchup, molasses, Worcestershire sauce, tamari (that's gluten free soy sauce), garlic powder, apple cider vinegar, salt and pepper, and that he cooked it on the stove to reduce it to a desired consistency.  No worries, though, sauces are a personal thing and you should make yours (if you even want one) to your own liking.

Tuesday, April 24, 2012

BBQ Pulled Pork and Buttery Cornbread

In my last post I mentioned how Hubby and I spent Sunday doing some low and slow bbq style cooking, including the brisket that I talked about there. Well, also whipped up during our lazy, rainy afternoon was some most excellent Slow Cooker Pulled Pork and Buttery Cornbread (as is customary you will find the recipes that we based our adventures on at the links). Both of these were super easy and required little attention. Here are our versions, as usual slightly altered from what we found online:

PULLED PORK


Ingredients
  • 4 pounds of pork tenderloin
  • 24 fluid ounces of root beer
  • Homemade bbq sauce (Hubby’s recipe consisted of approximately 12 ounces ketchup, 6 ounces molasses, 6 ounces Worcestershire sauce, a tablespoon or two of garlic power, a tablespoon or two of onion powder, a half-tablespoon of cayenne pepper, and a half-tablespoon black pepper)
Directions

Place the pork tenderloin in a large crock pot along with the root beer. Cover and cook on low until well done and the pork shreds easily, about 5 to 6 hours.


Shred the meat with two forks and mix it with the bbq sauce.


Like a lot of barbecue that isn’t of a typical Carolina style, this one was all about the sauce. We tasted the meat before mixing it with the sauce, and truthfully, couldn’t quite discern the root beer much, if at all. Therefore, we don’t know that it was necessary to use root beer per se, and perhaps any liquid of your choice would have done. Once it was coated in the sauce, though, damn was it good. All those kudos go to Hubby for the sauce he created. Sauces and rubs are, after all, his forte.

BUTTERY CORNBREAD


Ingredients
  • 2/3 cup butter, softened
  • 1 cup sugar
  • 3 eggs, beaten
  • 1 and 2/3 cups milk
  • 2 and 1/3 cups all-purpose flour
  • 1 cup cornmeal
  • 4 and 1/2 teaspoons baking powder
  • 1 teaspoon salt
  • 1 ear of corn, raw, kernels removed
Directions

Preheat your oven to 400-degrees.

In a mixing bowl (we used a stand mixer), cream the butter and sugar.  Combine the eggs and milk in another bowl. In a third bowl, combine flour, cornmeal, baking powder and salt.

Add the wet and dry ingredients to the creamed butter/suger mixture alternately until everything is incorporated.


Dump in the raw corn kernels and give it one last twirl.


Pour the batter into a greased 13x9 dish and Bake at for about 25 minutes or until a toothpick inserted near the center comes out clean. Cut into squares and serve warm or cold. 


I'll tell you what -- the name of this cornbread did *not* lie.  It was super-buttery and delicious.  A lot of times I will spread butter onto my cornbread before eating it -- that was wholly unnecessary with this one.  =)

Monday, April 23, 2012

Beef Brisket and Parsnip Puree


Over the weekend, since we had a completely rainy/wash-out type Sunday on the agenda, we decided to stay in the house all day to do some crock pot and time-lengthy oven cooking….bbq style. There were several dishes to be made, each leaving us with plenty of leftovers for the week’s lunches and subsequent dinners. The first two recipes I will talk about in this post, and the other two I will address in a second blog later this week.

The Brisket

I found the brisket recipe at foodnetwork.com courtesy of Tyler Florence. He calls it, as he does with most of his stuff, the “ultimate.” You can click on the link at the beginning of this paragraph to see the actual recipe. I am not going to re-type it here this time, like I usually do, because while it was certainly a good brisket, and we also really liked the vegetables that came from it, it was definitely not, in our opinion, the ultimate. The only changes I made from Tyler’s instructions were to use fresh tomatoes instead of canned (halved then hand crushed), garlic that was already peeled (not still in the head), and I used dried thyme, rosemary and parsley. Other than that, I stuck to the recipe exactly. I also decided at the end to make a gravy with the juices that everything was braised in. Here are a few pictures of my process:

Four pounds of raw beef brisket.

The chopped veggies; essentially, an over-sized mirepoix.

Going into the oven.

Coming out of the oven.

Cooked brisket straight out of the braising process.

Veggies and braising liquid right out of the oven.

Drained veggies.

Freshly sliced brisket.

Making the gravy.

The Parsnip Puree

What I really want to focus on today is the parsnip puree that Tyler suggested be served with the brisket. We had never really cooked with parsnips before, and so we thought this would be good experiment in something new. Well, it was fantastic, and quite frankly, hands down our favorite part of this entire dinner. Here is exactly how I did it:

Ingredients
  • 1 pound parsnips, peeled and sliced
  • Kosher salt and freshly ground black pepper
  • 1/2 cup milk
  • 1/2 cup heavy cream
  • 4 cloves of garlic, peeled and gently smashed
  • 1/2 tablespoon dried thyme
  • 1 bay leaf
  • 1 stick of butter, cubed
Directions

Place everything except the butter into a pot over medium heat. Bring it to a simmer, and then cook until tender (for mashing, basically). This should take about 10-15 minutes.


Place parsnips and all remaining pan liquids in a food processor with the butter (don't forget to remove the bay leaf at this point), and puree it until the texture of whipped potatoes is achieved.


Serve. You could also (but I didn’t) add more cream and/or milk to achieve a runnier consistency, if desired.

I am sure that it’s mostly due to the butter and cream content that these were so very yummy, but the flavor of the parsnips themselves still shone through strongly. This was a complete success of a side dish that we will undoubtedly use again.