(Food is Love. Food is Culture. Food is Connection. Food is Adventure.)


Monday, September 10, 2012

Garlic, Garlic, and more Garlic

A couple years ago, we were originally planning to take a vacation and drive across the country to the Gilroy Garlic Festival in California.  Finances, new jobs, and lack of vacation time, etc. caused that particular adventure remain on our "to do someday" list, and we instead decided to check out a more local event.  So, last weekend, we finally made a trip to the annual Southern Vermont Garlic & Herb Festival in Bennington, VT.

We knew that it wouldn't be anything like what goes on in Gilroy, and that's quite okay.  Bennington, VT, after all, isn't the "garlic capital of the world" that Gilroy is  ;)  What we experienced was in most ways exactly what we expected  and definitely worth the modest admission fee, but in one aspect a tad disappointing.  Here's the scoop....

Guided by volunteers wearing garlic hats and waving pool noodles (cute touch), we parked our car on the huge grassy field, and proceeded to the gates where we paid the $5 each to enter.  In exchange, we received neat-o hand stamps:


Seriously, I thought the stamp was cool.  I'm an oddball, whatever.  =P

As advertised, there was everything from garlic ice cream to garlic jelly, pickled garlic, roasted garlic, garlic braids, and, of course, plain garlic bulbs of every variety for sampling and purchase.  There was even a vendor making garlic lemonade (which unfortunately we not get to try).  There were demonstrations happening throughout the day (braiding, planting, a Home Depot kids workshop, etc), but we didn't get involved in that particular stuff.  There were also plenty of non-garlic-centric items available for sample and/or purchase -- such as arts & crafts, foods & beverage products, and even one vendor selling Vitamix blenders.  Essentially, it was like a giant farmers' market, with if I am remembering correctly, at least 10 long rows of tents all set up selling their various wares.  Being that it's Vermont, there were also lots of maple-based items.  There was a separate section where you could buy freshly prepared food, and in that same area was a band playing and a hay maze for the kiddos.  Finally, there was an absolutely huge and very, very interesting antique store on the grounds - I think they own the land on which the festival took place.  We spent a good amount of time browsing in there.

Anyways, we walked around most of the festival grounds, sampling things here and there, before making decisions and going back to purchase stuff.  We tried....

Various garlic and other oils and dips.  All very delicious.

Garlic fudge.  Quite interesting.

Black Garlic Chocolate Chip Shortbread Cookies.  We got the second to last bag of them.
They weren't bad at all, and the garlic seemed to give them a very moist, creamy texture.

Roasted Garlic Ice Cream.  Look, you can see the bits of garlic in there.
It was tasty, and I would absolutely eat this again.  It kind of reminded me of
one of the Tastefully Simply dips.  Weird, I know.  But it really was unexpectedly good.

And the be all and end all of stuff we sampled that day -- Deep Fried Garlic Cloves!!!
Oh.  My.  God.  So.  Awesome.  'Nuff.  Said.
I had expected them to be breaded or battered before, but they weren't, and it wasn't necessary at all.
Imagine, though, if they were?  Wow.  Maybe that will have to be an at-home foodventure sometime.

We tasted lots of other stuff, too, but just couldn't take pictures of it all.

Around noontime, we moseyed on over to the prepared foods/hay maze/band area and got lunch.  This, as I mentioned above, is where the disappointment of the day came into play.  I would have expected the things that people were cooking and selling here to be more, I don't know, special?  Some examples of things that were being served, but that I thought were too common, were garlic naan at the Indian food vendor, garlic sausages, and the thing I ordered and was not happy with: a garlic hamburger, which amounted to nothing more than a hamburger with some garlic slapped on top as if it were relish.  Boooo.  Definitely not Gilroy.

Overall, it was a nice time and I am glad that we went, but I see no need to make the three and a half hour drive to attend this event again.  Ironically, even though we are huge garlic fans and very much enjoyed the garlic-y treats that we sampled that day, nothing that we bought to take home (for ourselves) was garlic.  We bought a bottle of maple liqueur (soooo good), a jar of strawberry habanero jelly (wait until you see what we did with that last night!), two other jars of jelly from that same vendor, spicy pickles for a friend, fudge (normal, not garlic) for another friend, and a garlic sampler for a third friend.  I also went back to one craftsman to pick up a wicked cool steampunk-ish pepper grinder that I spotted earlier in the day, but by the time I got there, it was gone.  Oh, well.  In the end, the shopping bag ended up pleasantly heavy with our spoils.  :)

Wednesday, August 15, 2012

Goat Cheese and Chive Ravioli, in a Butter and Sage Sauce


On Monday night, because (as usual) we had leftover ingredients lying around, we decided to use up the goat cheese and make ravioli.  Here’s how it went down….

First, I mixed up the pasta dough.  I started with the basic recipe that came with the KitchenAid stand mixer roller attachments, halved, but made some adjustments of my own based on past experiences with it:
  • 1-3/4 cups of all purpose flour
  • 1 teaspoon salt
  • 2 eggs
  • water (the recipe calls for a tablespoon, but the exact amount you will need will always vary depending on humidity and how packed the flour was.  I probably used about 2 tablespoons this time total; you have to go by how the dough looks – see below)
  • chopped dried chives (I’m guessing about a tablespoon’s worth; I didn’t measure)
Into the bowl it all went and was mixed using the regular paddle attachment until it came together into a dough ball (this is the part where you have to add water a teeny bit at a time until it comes together, but if it gets too sticky, you add a little more flour, and so on and so forth until you get the right consistency – able to be formed into a ball, but not sticky).


Next, I switched out the paddle attachment for the dough hook, and kneaded the dough for about two minutes, after which I kneaded by hand it for another two minutes.


I wrapped the dough ball in plastic wrap and stuck it in the fridge, mostly because the recipe I was basing off of said to, but I don’t think this step is truly necessary if you are in a hurry (it’s not like this is pie dough and contains butter that needs to re-harden or anything.  As long as it’s made to the right consistency to begin with, I think you could skip the fridge and start rolling and cutting right away).  All in all, last night’s dough ball probably only spent about 10 minutes in the fridge while I was waiting for Hubby to be ready to make the sauce (that was his half of the responsibility for last night’s dinner festivities).


As for that sauce, I initially was going to simply use the sauce that I had made a few weeks ago and froze, but Hubby found a Butter and Sage Sauce recipe by Mario Batali, so that’s what we ended up deciding on.  The sauce had four simple ingredients:
  • 4 tablespoons butter
  • 8 sage leaves (Hubby substituted about a tablespoon of dried sage leaves instead)
  • 1/2 lemon, juiced
  • 1/4 cup grated Parmesan cheese
Hubby put the sauce together according to Mario’s recipe, except he added the cheese right away instead of waiting for the pasta to be tossed in.  This way the sauce would be waiting for me, all done, as soon as the pasta was cooked.  He also decided after he was done that it might not be enough sauce, so he went back and doubled the recipe.


While he was doing all of this, I was rolling out pasta dough and turning it into raviolis.

First, I divided the dough into four sections and made sure they
had enough flour on the outside to not stick to the rollers.

Next, I started rolling each piece through the machine,
according to the machine's instructions....
 
....until it was as thin as I wanted it.


Next, I cut each strip of flat dough in half, inserted bits of goat cheese
on the bottom layer, wet the seams with water, and covered it with the top layer.
 
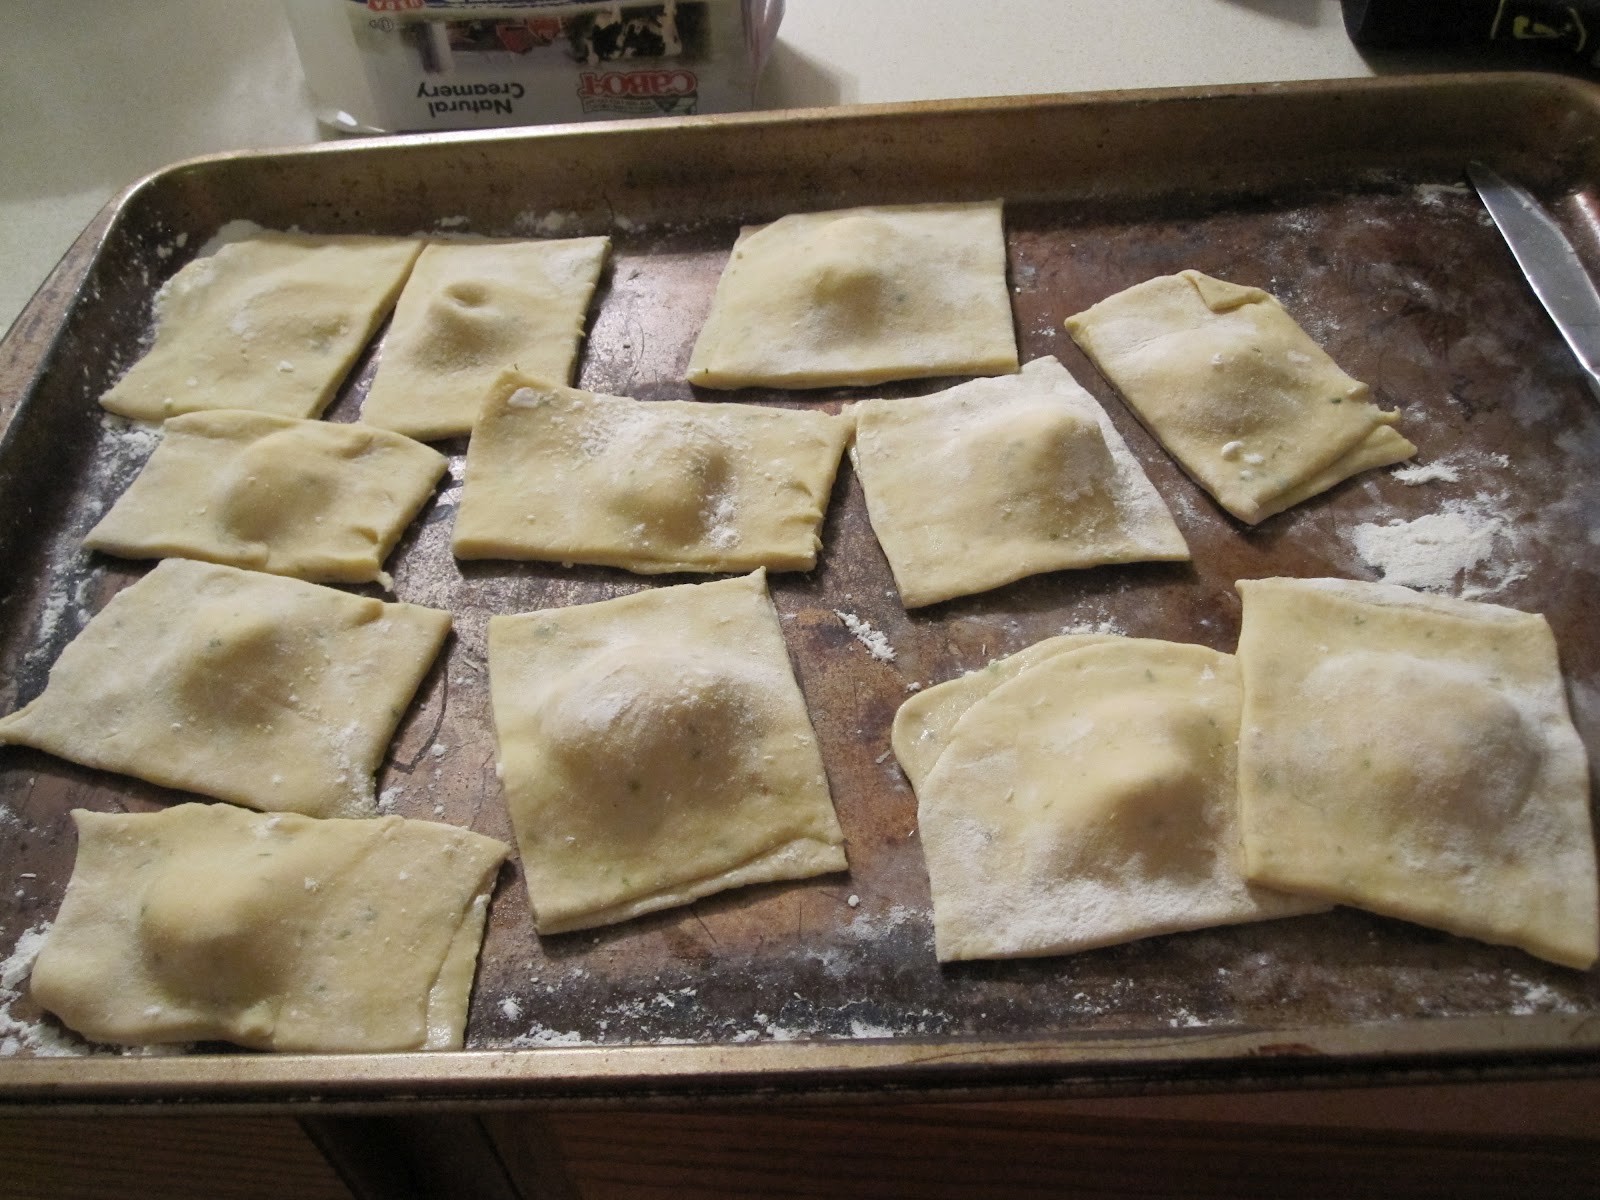
Then I cut them into individual ravioli and trimmed off the excess.

The leftover pieces of dough, which you can see here being cut off and piled
up in the corner of the cookie sheet, were brought back to the rollers
and made into more flat sections/more ravioli.  Nothing got wasted.

We ended up with twelve BIG ravioli.  Just look at those chives peeking through:


Finally, it was time to cook the pasta and toss it in the sauce.


....and.....Presto!  One delicious dinner:


I know you are probably thinking that this is awfully time consuming for a weeknight dinner, but really it’s not.  When making homemade pasta, especially with an electric mixer, you can have your dough mixed and in the fridge in less than 10 minutes.  And while you are waiting for your water to boil is when you do your rolling and cutting.  So, really, other than the extra 10 minutes to make the dough, you are looking at the same amount of time as if you cooked a box of pasta, except this time, you are doing something productive while waiting for the water to boil other than watching the pot – you are rolling and cutting pasta.  I have decided, though, that I would like to invest in some ravioli molds, maybe something like this, in order to be able to make them more uniformly sized and shaped next time.

We are nothing at all without her.

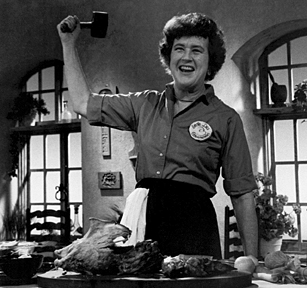
Today, Julia Child would have been 100 years old.


Without her....food TV would not exist, none of us could be foodies or even know what that means, and the American culinary landscape would be barren.


We owe it all to her and her robust personality.  She is a gastronomic legend.


All across Boston and Cambridge especially, tributes to Julia are happening.  Her favorite store, Savenor's, is serving birthday cake, there is a symposium being held at the Harvard Radcliffe Schlesinger Library, and more. 


Happy Birthday to you, Julia!!  You are our hero.

Wednesday, July 25, 2012

My own little episode of "Chopped" -- Dessert style

After dinner tonight (a marinated and grilled London broil with fresh potato salad, corn on the cob and steamed green beans), I decided that it was time to use up a small bunch of ranier cherries that were going to be trash before the next few days were over.


I had been thinking all day that maybe they should become some sort of dessert, so I looked around the kitchen to see what else was on hand, and played my own little game of Chopped.  This is what happened (all within a matter of about 20-30 minutes, the customary allotted time on the show)....

First, I got my oven warming to 350-degrees, because I knew that I'd be using a couple of cupcake cups of yellow cake batter than we had in the freezer.


As those were thawing out, I picked out the cherries with any kind of rot or mold, then pitted and chopped up the rest and threw them into a small sauce pot along with some juice and zest from the lemon that I had used to make a glass of lemonade with dinner.


Next, I added what I estimate to be about a quarter to a half cup of white grape juice from the fridge (bought for a rib recipe but always comes way too much in the bottle than we need for it) and maybe 5 or 6 teaspoons of sugar.

 
I tossed the cupcakes into the oven, set the timer for 20 minutes, and then came back to the cherry mixture which I brought to a boil and then turned it down to simmer.


At this point, I began thinking: "What else does this dish need?"  Chocolate sauce, duh.  Or....chocolate filling!  Back to the cabinet I went and grabbed a Hershey bar (leftover from a S'mores adventure).  I broke it up into a measuring cup and added a couple tablespoons of milk.  I set this aside and waited for the cupcakes and cherry sauce to be done.


This is where it all comes together.  I popped the chocolate into the microwave for 15 seconds, then stirred it to make sure it was all melted.  It turned out a little thin, so I plopped in a spoonful of cornstarch and put it back into the microwave for another 30 seconds (until it boiled).  Another few stirs and it was nice and thick like a ganache.

Time for plating!!!  I used my pastry bag with a wide tip to pipe the chocolate into the center of the now unwrapped cupcakes, piped some onto the plate, and spooned the cherry sauce both onto the plate and on top of the cupcake.  Presto:


It was gooooood!  And husband approved.  :)

Monday, June 25, 2012

A Saucy Experiment

I have been meaning for a while now to try making tomato sauce from scratch.  I mean, really from scratch....no canned tomatoes, no processed/packaged tomato paste....but actually starting with fresh, whole, raw fruit.

Well, yesterday, I did it.  Completely without a recipe and without even researching beforehand.  I invented this all on my own, and Hubby and I both think it's pretty darn good!

I started with about 4½-5 pounds of tomatoes.  I bought the most affordable ones there were at our market, because, well, this was an experiment after all and I didn't want to waste too much money if it turned out to be a total fail.


Preheating the oven to 400-degrees, I chopped them up and piled them into our largest enameled cast iron dutch oven.


I decided to mash them up a bit before popping them into the oven.  In hindsight, I doubt this step was necessary, but since I did it, I am recounting it here.


3 hours later, this is what they looked like:


Next, I put the pan on top of the stove and started the process of simmering and stirring every 10-15 minutes.  But first, I whipped out the stick blender and pureed it all.  At this point, I also added about a half cup of vegetable stock (also homemade from scratch - we keep it in the freezer in ice cube size portions), because I wanted to loosen up the consistency a bit.


After a little while, it was time to add spices.  I went with about 10 cloves of fresh garlic (minced), dried oregano, dried basil, salt, black pepper, a small amount of red pepper flakes, and a teaspoon of sugar.


After about another hour and a half of simmering and stirring, basically until I felt the garlic was cooked and starting to dissolve, I decided it was done.  I gave it one more ride on the stick blender, and this was the final result:

(before the final blending)

(after the final blending)

Finally, we "packaged" it into old salsa jars that we had saved, and into the freezer they went.  These are just the right size for a meal for just the two of us.  :)


Now, I know that there are other ways to make sauce from total scratch, such as pureeing the tomatoes while raw and/or doing all of the cooking on the stove top (skipping the oven completely).  This was just the way I chose to experiment, and it turned out quite well.  I am sure I will try other methods in the future, but one thing is for sure....we will never (well, at least very rarely) buy prepared tomato sauce or canned tomatoes again.  :)

As for the cost, this turned out to be approximately $5.00 for what amounts to about a jar and a half's worth of store-bought sauce....so it's a little more pricey, but we think well worth it.